Unlock The Power Of Remote IoT Device SSH: A Beginner's Tutorial
Welcome to the world of remote IoT device SSH, where technology meets convenience and efficiency. If you've ever wondered how to securely connect to your IoT devices from anywhere in the world, this is the ultimate guide for you. In this article, we'll dive deep into the world of SSH (Secure Shell) and how it can revolutionize the way you interact with your IoT devices. So, buckle up and let’s get started!
SSH might sound like a complicated term, but trust me, it's not as intimidating as it seems. Think of SSH as a secure communication tunnel between your computer and your IoT devices. It allows you to control, configure, and manage your devices remotely without compromising security. This is especially important in today's world, where cybersecurity is more crucial than ever.
Whether you're a tech enthusiast, a hobbyist, or someone looking to expand their knowledge of IoT, this tutorial will walk you through every step. By the end of this article, you'll have a solid understanding of how to set up and use SSH for your remote IoT devices. Let's make this journey fun, informative, and easy to follow.
What is SSH and Why Should You Care?
SSH, or Secure Shell, is like a secret handshake between your computer and your IoT devices. It’s a protocol that provides encrypted communication, ensuring that your data stays safe while traveling across networks. In simpler terms, SSH lets you log into another computer over a network, execute commands, and move files—all securely.
Why should you care? Well, imagine being able to troubleshoot your smart home devices from the comfort of your office or monitor your industrial equipment while sipping coffee at a café. SSH makes all of this possible while keeping hackers at bay. It’s like having a personal bodyguard for your data.
How SSH Works in IoT
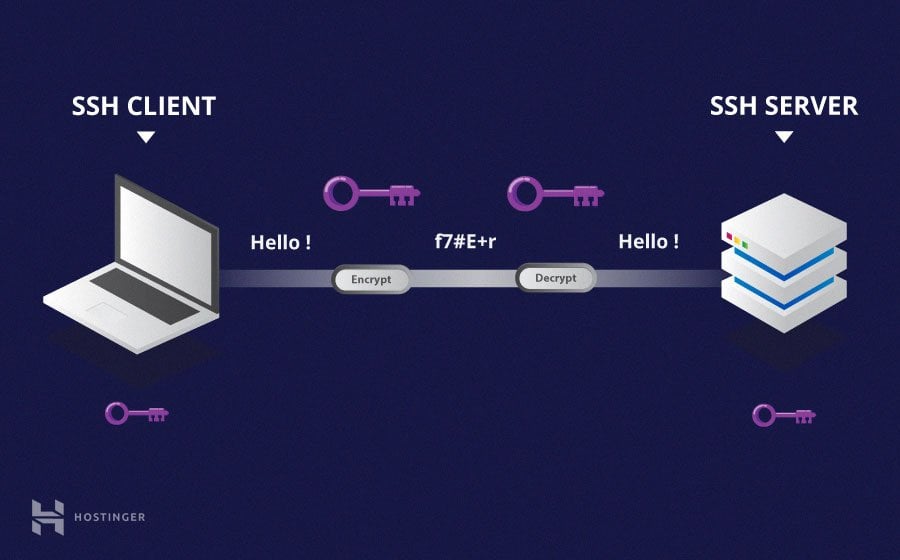
SSH works by creating a secure, encrypted connection between your local machine (the one you're using) and your IoT device. Here's a quick breakdown:
- Client-Server Model: Your computer acts as the client, while your IoT device acts as the server.
- Encryption: All data transmitted between the two is encrypted, making it nearly impossible for unauthorized parties to intercept.
- Authentication: Before gaining access, SSH requires authentication, usually through passwords or public-key cryptography.
This process ensures that only authorized users can access your IoT devices, even when they're connected to public networks.
Setting Up Your IoT Device for SSH
Before diving into the SSH tutorial, you need to prepare your IoT device. This step is crucial because not all IoT devices come pre-configured with SSH enabled. Let’s break it down:
Step 1: Check If SSH is Enabled
Most modern IoT devices have SSH support, but you need to confirm whether it's enabled. Here's how you can check:
- Log into your IoT device's web interface or management console.
- Look for an option labeled "SSH" or "Remote Access."
- If SSH is disabled, enable it by following the on-screen instructions.
If your device doesn't have a web interface, you might need to use a terminal or command-line tool to check SSH status.
Step 2: Update Your Device
Keeping your IoT device up to date is essential for security and performance. Run the following commands to update your device:
- sudo apt update
- sudo apt upgrade
These commands will ensure your device has the latest security patches and software versions.
Connecting to Your IoT Device via SSH
Now that your IoT device is ready, it's time to connect to it using SSH. This process is straightforward, but there are a few things you need to keep in mind.
Step 1: Install an SSH Client
If you're using a Windows or macOS computer, you already have an SSH client built in. For Windows, you can use PowerShell, and for macOS, you can use the Terminal app. If you're on Linux, you're all set because SSH is usually pre-installed.
Step 2: Find Your IoT Device's IP Address
To connect to your IoT device, you need its IP address. You can find this information in several ways:
- Check the device's web interface or documentation.
- Use a network scanner app like Fing to discover all devices on your network.
- Run the "ifconfig" or "ip addr" command on your IoT device.
Once you have the IP address, you're ready to proceed.
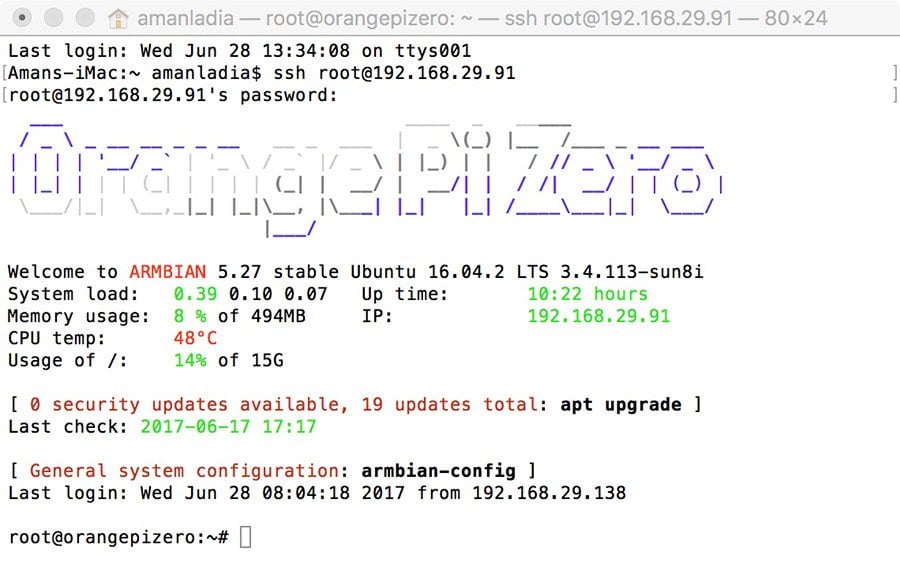
Step 3: Establish the SSH Connection
Open your terminal or command prompt and type the following command:
- ssh username@IP_address
Replace "username" with your IoT device's username and "IP_address" with the actual IP address. You'll be prompted to enter a password. If everything goes well, you'll be connected to your IoT device.
Troubleshooting Common SSH Issues
Even with the best preparation, things can sometimes go wrong. Here are some common SSH issues and how to fix them:
Problem 1: Connection Refused
If you receive a "Connection refused" error, it usually means SSH is not enabled on your IoT device. Double-check the settings and ensure SSH is active.
Problem 2: Permission Denied
This error often occurs when you use the wrong username or password. Double-check your credentials and try again. If the issue persists, consider resetting your IoT device's password.
Problem 3: Host Key Verification Failed
This error happens when your computer doesn't recognize the IoT device's host key. To fix it, delete the device's entry from your known_hosts file:
- sudo nano ~/.ssh/known_hosts
- Find and delete the line corresponding to your IoT device.
Save the file and try connecting again.
Advanced SSH Techniques for IoT
Once you're comfortable with basic SSH commands, you can explore more advanced techniques to enhance your IoT experience.
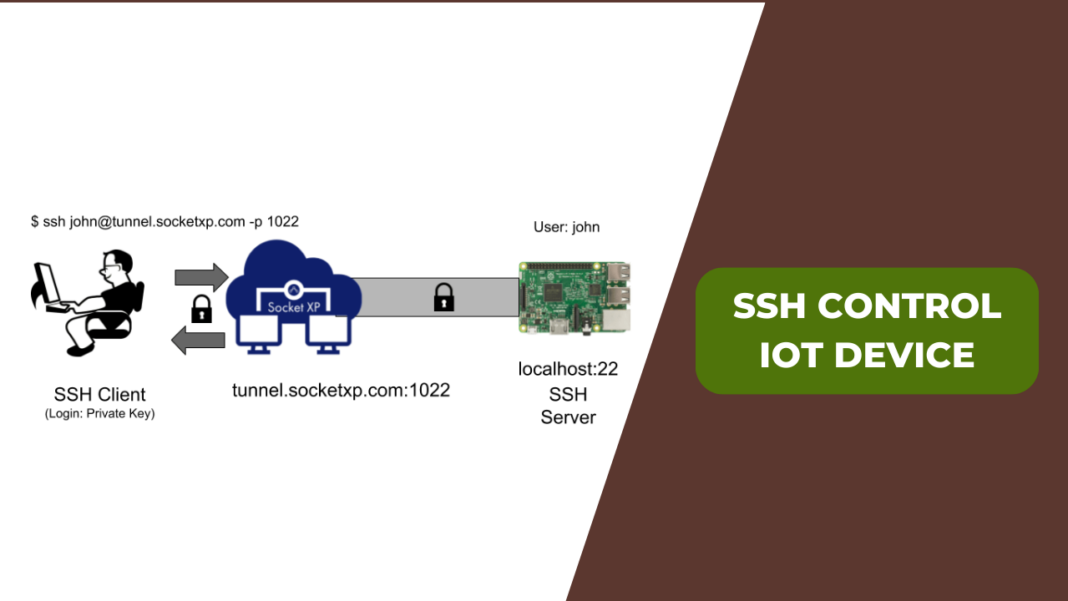
Tunneling and Port Forwarding
SSH tunneling allows you to securely forward traffic between your local machine and your IoT device. This is particularly useful when accessing services that aren’t exposed to the internet. Here's how you can set it up:
- ssh -L local_port:destination_host:destination_port username@IP_address
Replace the placeholders with your specific details. This command creates a tunnel that forwards traffic from your local machine to the destination host.
SSH Key Authentication
Using passwords for SSH authentication can be tedious and insecure. A better approach is to use SSH keys. Here's how:
- Generate a key pair using the command: ssh-keygen
- Copy the public key to your IoT device: ssh-copy-id username@IP_address
Now, you can log in without entering a password every time.
Security Best Practices for Remote IoT SSH
Security should always be a top priority when dealing with IoT devices. Here are some best practices to keep your SSH connections secure:
- Use strong, unique passwords or SSH keys for authentication.
- Disable password-based authentication if you're using SSH keys.
- Change the default SSH port (22) to a non-standard port to reduce automated attacks.
- Regularly update your IoT device's firmware and software.
By following these practices, you can significantly reduce the risk of unauthorized access.
Real-World Applications of Remote IoT SSH
SSH isn't just for hobbyists and tech enthusiasts. It has real-world applications across various industries:
Smart Home Automation
With SSH, you can remotely manage your smart home devices, such as thermostats, security cameras, and lighting systems. Imagine adjusting your home's temperature or turning off lights from your office desk.
Industrial IoT
In industrial settings, SSH allows engineers to monitor and control machinery from remote locations. This capability is vital for maintaining productivity and ensuring safety.
Agriculture
Farmers use IoT devices to monitor soil moisture, weather conditions, and crop health. SSH enables them to access this data and make informed decisions without being physically present.
Conclusion: Take Your IoT Skills to the Next Level
In this tutorial, we've explored the world of remote IoT device SSH and how it can transform the way you interact with your devices. From setting up SSH to troubleshooting common issues and implementing advanced techniques, you now have the knowledge to confidently manage your IoT devices remotely.
Remember, security is paramount. Always follow best practices to protect your devices and data. Whether you're automating your smart home or monitoring industrial equipment, SSH is a powerful tool that offers convenience and peace of mind.
So, what are you waiting for? Grab your terminal, connect to your IoT device, and start exploring the possibilities. Don't forget to share your experiences and tips in the comments below. Happy SSH-ing!
Table of Contents
- What is SSH and Why Should You Care?
- Setting Up Your IoT Device for SSH
- Connecting to Your IoT Device via SSH
- Troubleshooting Common SSH Issues
- Advanced SSH Techniques for IoT
- Security Best Practices for Remote IoT SSH
- Real-World Applications of Remote IoT SSH
- Conclusion: Take Your IoT Skills to the Next Level
Detail Author:
- Name : Mrs. Vickie Boyle MD
- Username : maximo.corkery
- Email : ayla83@greenfelder.com
- Birthdate : 1977-05-29
- Address : 1920 Nolan Ridge Port Lucieview, OR 07188-9951
- Phone : +1-725-684-5861
- Company : Hermann-Braun
- Job : Rail Transportation Worker
- Bio : Quo provident dolor rem occaecati. Asperiores sed numquam dolor quibusdam. Et est architecto saepe. Optio vel ducimus explicabo dicta dolores aperiam velit.
Socials
tiktok:
- url : https://tiktok.com/@hermiston1998
- username : hermiston1998
- bio : Sed optio expedita ea. Iusto magni officiis esse quis eos et.
- followers : 5008
- following : 1315
twitter:
- url : https://twitter.com/hermistonk
- username : hermistonk
- bio : Nemo optio et voluptas praesentium. Et distinctio officia pariatur ea id id et. Qui adipisci quia placeat doloribus vero dolores.
- followers : 2841
- following : 2073
linkedin:
- url : https://linkedin.com/in/hermiston1976
- username : hermiston1976
- bio : Sunt eius quasi esse minima maxime.
- followers : 4837
- following : 772
